

Liaison & Administrator Guides
These guides are for college liaisons and administrators who manage Watermark Faculty Success accounts at NMSU. Learn how to create accounts, disable or restore access, and update security roles.
The instructions use Admin View. Available tools and options depend on your assigned permissions. Select a guide below to get started.
Add a Faculty or Staff Account
Create an account for a faculty or staff member who needs access to Watermark Faculty Success.
Before you begin: Have the person's name, NMSU email, campus username, college/department, and approved access requirements available. Use Admin View for these instructions.
-
Check for an existing account.
Open Tools → Users and Security. Search by username or email, including disabled users. If an account exists, update or re-enable it instead of creating a duplicate. Select Add a New User.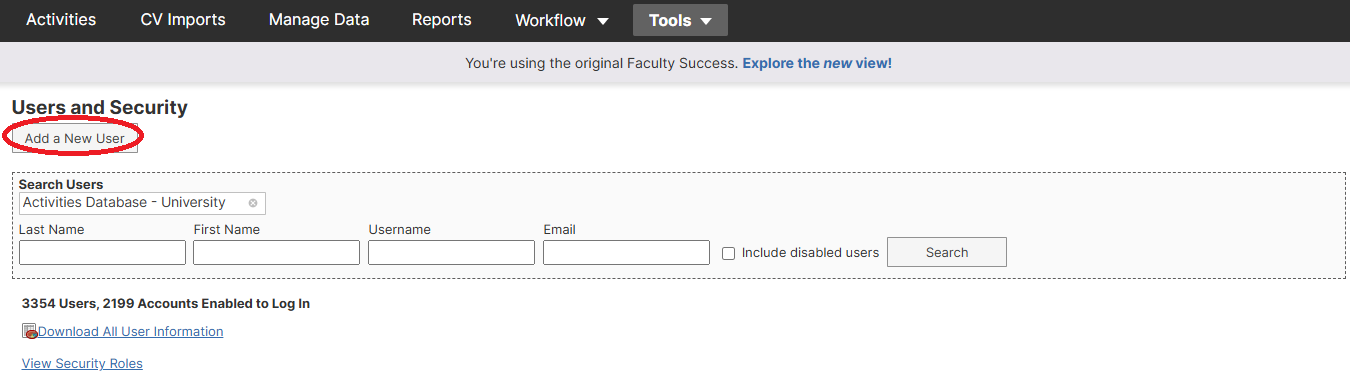
-
Enter account information.
Enter the name, NMSU email, and campus username. Verify any automatically populated username and use NMSU's configured single sign-on authentication.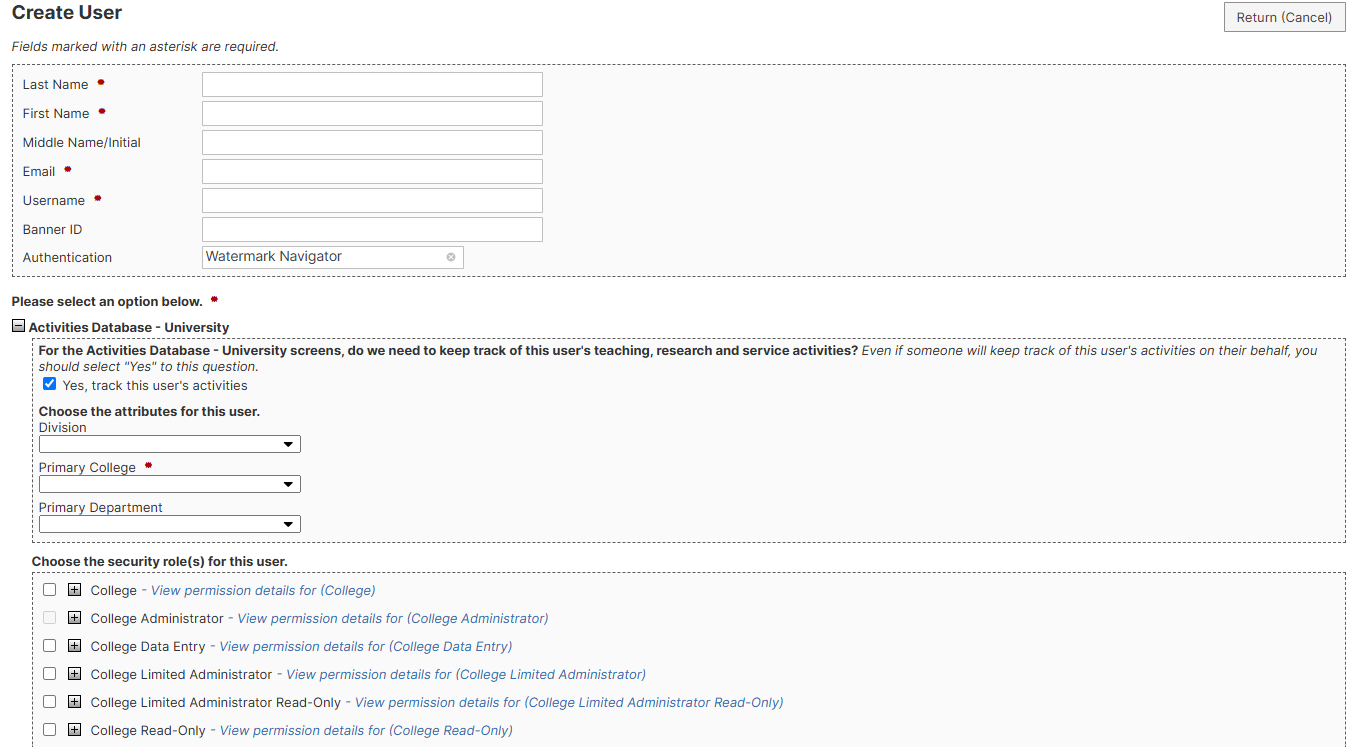
-
Configure activity tracking.
Enable activity tracking when the person's own activities need to be recorded. Complete the applicable college, department, and other requested fields. -
 Assign approved access.
Select the appropriate security role(s) and any required college or department scope. Use Details to review permissions.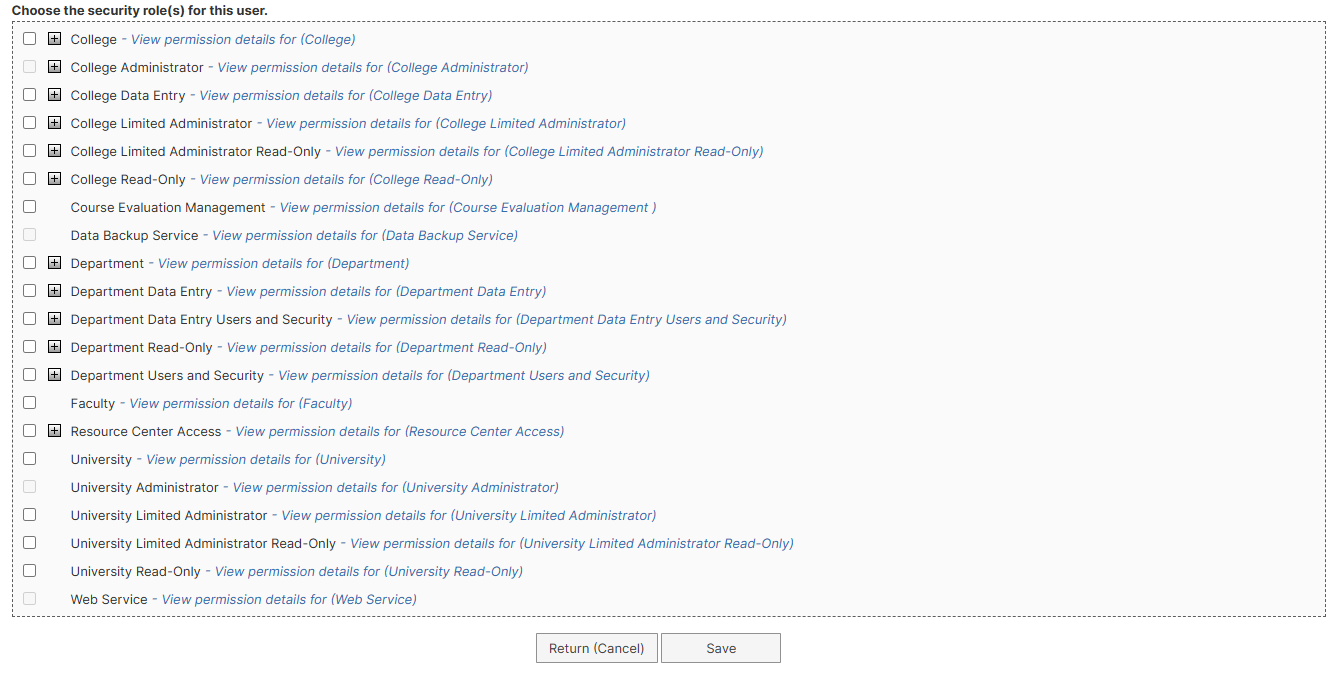
-
Save and verify.
Review the information, select Save, then search for the account to confirm its creation.
Related guidance: Watermark's guide to creating user accounts.
Disable or Re-enable an Account
Disable an account when access should end while retaining its activity records. Re-enable an existing account when access should resume.
Before you begin: Confirm the requested account change. Use Admin View for these instructions.
Disable an account
-
Find the account.
Open Tools → Users and Security. Search by username, email, or name. Verify the person, then select the pencil in the Edit column.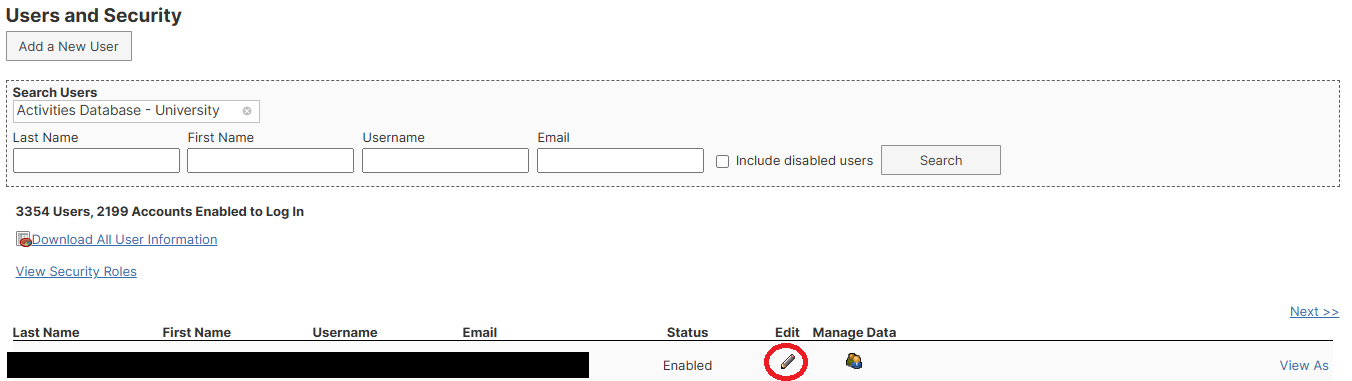
-
Disable access.
On the Edit User page, select Disable User. Do not select Delete User, which permanently removes account data.
-
Verify the status.
Search again with Include disabled users selected and confirm that the account is disabled.
Re-enable an account
-
In Users and Security, select Include disabled users and search for the account.
-
Open the account using its Edit pencil, then select Enable User.

-
Search again and confirm that the account is enabled.
If the action is unavailable, follow the explanation shown on the page or contact the central Faculty Success administrator.
Related guidance: Watermark's guide to account status changes.
Update a User's Security Roles
Update security roles when a person's responsibilities or authorized access change.
Before you begin: Confirm the approved role(s) and college or department scope. Use Admin View for these instructions.
-
Find the account.
Open Tools → Users and Security. Search by username, email, or name. Verify the person and select the pencil in the Edit column. -
Review current access.
Locate the security-role section. Review existing selections and use Details to inspect permissions. -
Update roles and scope.
Select the approved role(s) and remove access that is no longer authorized. For a scoped role, select the appropriate college(s) or department(s). Retain the Faculty role when it remains applicable. -
Save and verify.
Select Save. Reopen the account and confirm the saved roles and scope.
About unit scope: Selecting a college or department for a security role controls access. It does not change the person's own college or department appointment. Refer appointment corrections to the central Faculty Success administrator.
Related guidance: Watermark's guide to managing user accounts.